

Setting Up a Stereo System
A Step-by-Step Guide to a Simple System (Updated 2025)
I must confess when I started working for the Stereo Barn, I did not know how to set up a basic stereo system.
I knew the red wires went in the red holes, black wires in the black holes, and that was about it.
Well, everyone starts from somewhere and I learned pretty quickly the ins and outs of a stereo system and how everything works together to make your music sound the best it possibly can.
What I realized is a lot of people who come to our store looking for a stereo system may not know how to set one up.
My goal is to walk you through how to hook up a simple stereo system so you can enjoy listening to your favorite music, whether you listen to CDs, streaming, radio, records, cassette tapes, or any other music source.
Jump to a section:
- What do you need to set up a stereo system?
- How to hook up a stereo system in 5 steps
- 1. When connecting your stereo system, it is important to have it unplugged from the electric outlet.
- 2. Set up your equipment where it should go.
- 3. Connect the sources to the receiver.
- 4. Run your speaker wire from the receiver to your speakers.
- 5. It is now safe to plug your stereo system into the electric outlet.
What do you need to set up a stereo system?
Having worked in the audio/video business for the past few years, I’m no stranger to hooking up a stereo system. Many people don’t know what you need to do to connect a good, basic stereo setup and that knowledge isn’t something people are just born with or else I wouldn’t be writing this!
So, before I dive into any lengthy explanations, here’s a simple list of everything you need for a basic stereo system:
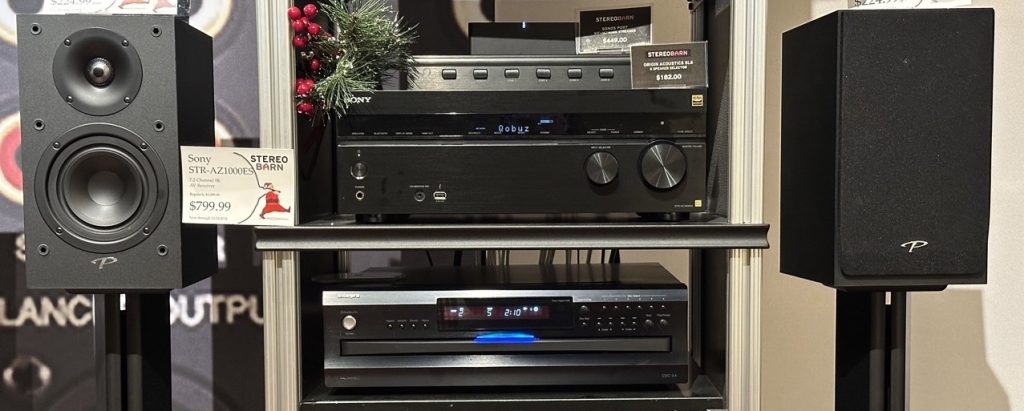
- Stereo receiver – The receiver is the heart, soul, and brain of your stereo system. Everything connects to the receiver, which is where you adjust the volume and select what you want to listen to.
- Sources – This is what you listen to. Examples are anything you get music from, like a CD player, turntable, network streaming player (like Sonos), phone, tablet, computer, cassette deck, AM/FM radio, iPod, etc.
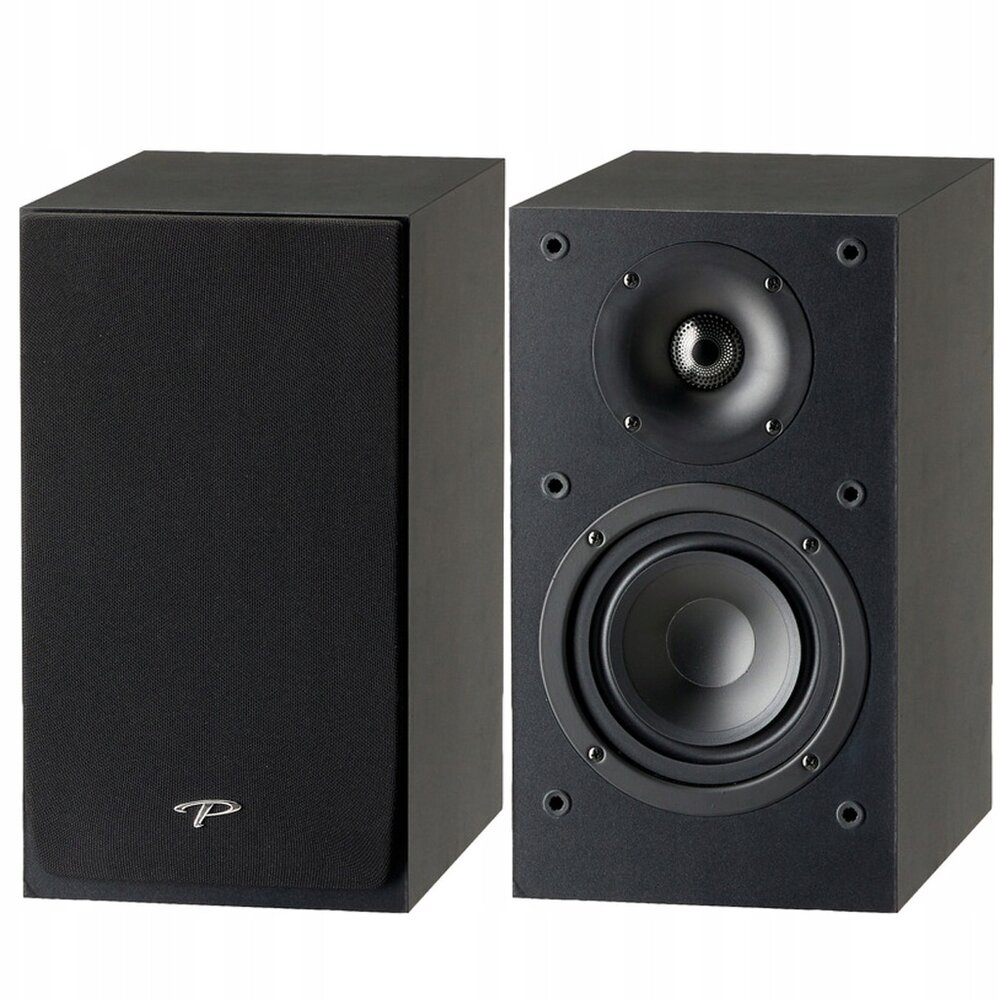
- Speakers – This is where the sound comes from. For a stereo system, you need TWO speakers. Stereo, by definition, is a right and left channel of music. Almost all music is recorded in stereo.
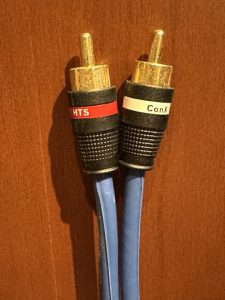
- Cables – Cables connect your music sources to your receiver. Typically, you’ll use the red and white audio cables for this, which is an analog connection. If your receiver has a digital-to-analog converter (DAC) built into it, you can also digital audio cables which are of optical or coaxial design.
- Speaker wire – You need speaker wire to carry the audio from your receiver to your speakers. It is important to use the proper gauge (thickness) wire. For best results, I recommend using a minimum of 16 gauge and a speaker cable made from oxygen-free copper wire.
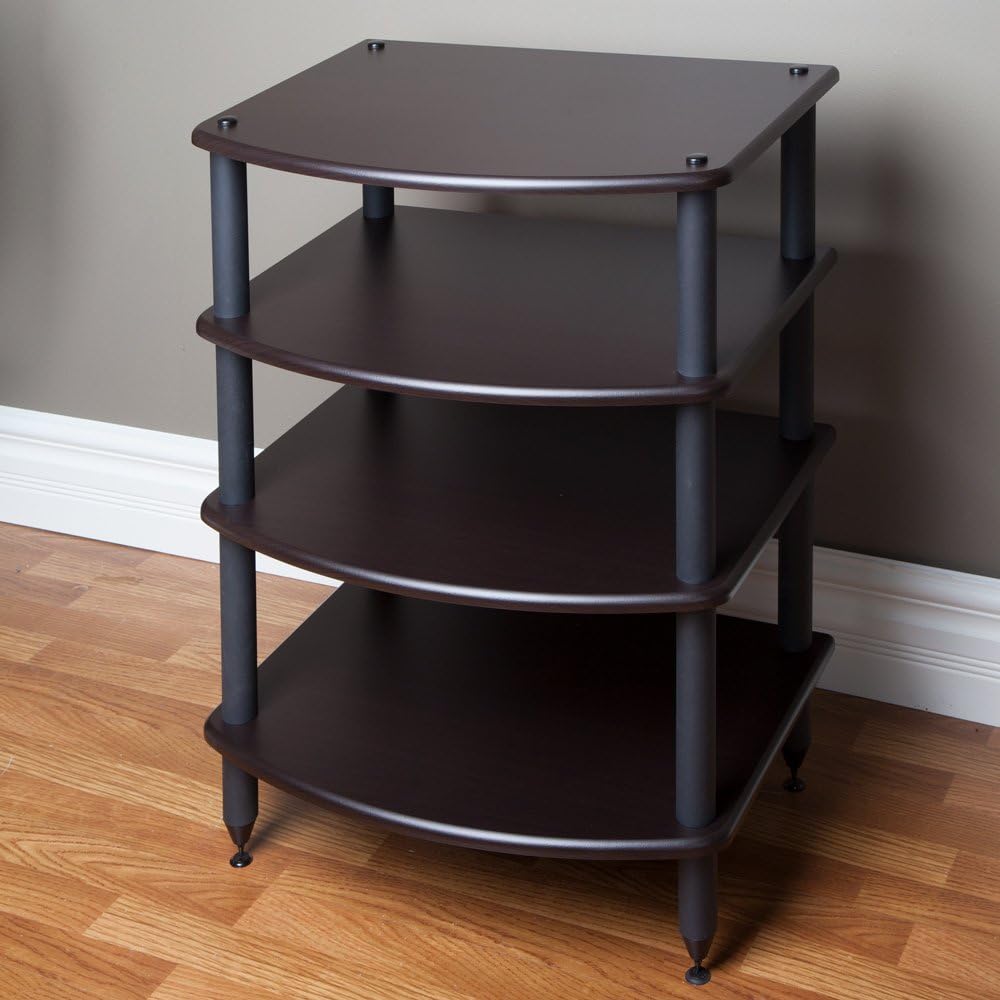
- A/V stand or shelf – Any piece of furniture with shelves will do, as long as you can run wire between each shelf. Also, there should be enough room for proper ventilation as heat buildup can adversely affect performance.
This is not a comprehensive list of all requirements, but will cover most situations. Every stereo system is unique and your needs may be different. A setup like this will give you great sound for whatever you listen to.
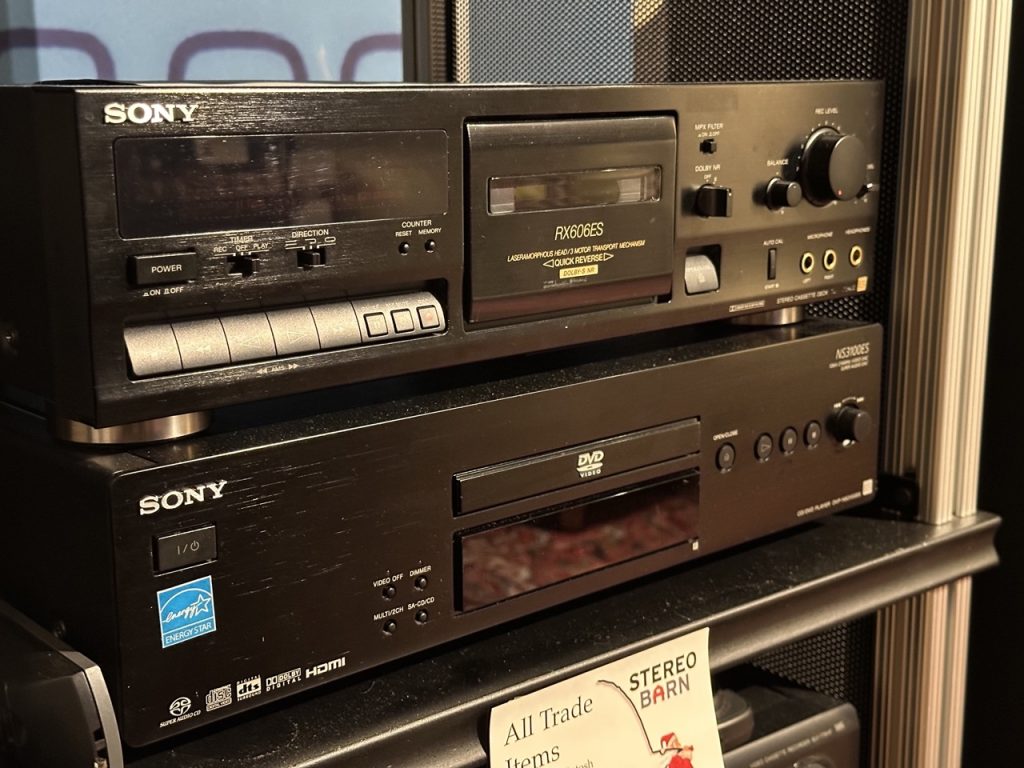
Here are your stereo receiver and sources of music, like a network streaming player, turntable, cassette tape, and CD player.

You will need a pair of speakers.
These are your audio cables.
This is your audio/video stand.
How to hook up a stereo system in 5 steps
Now that you have all of your stereo components, it’s time to start connecting them into a working stereo system!
1. When connecting your stereo system, it is important to have it unplugged from the electric outlet.
Never connect speakers, or source inputs with the speaker powered on. It is possible to cause damage to your equipment if you do.
2. Set up your equipment where it should go.
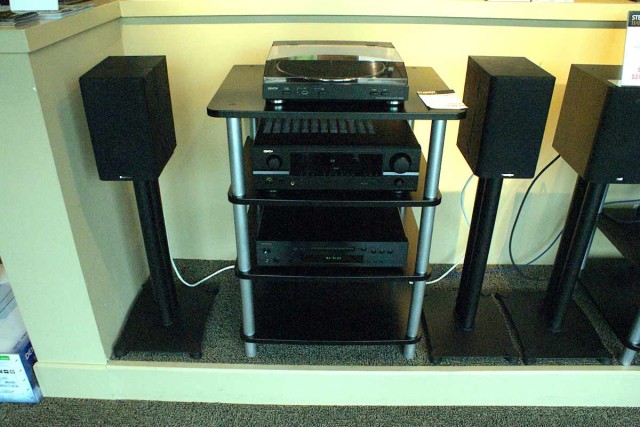
A typical setup would be as follows (from top to bottom):
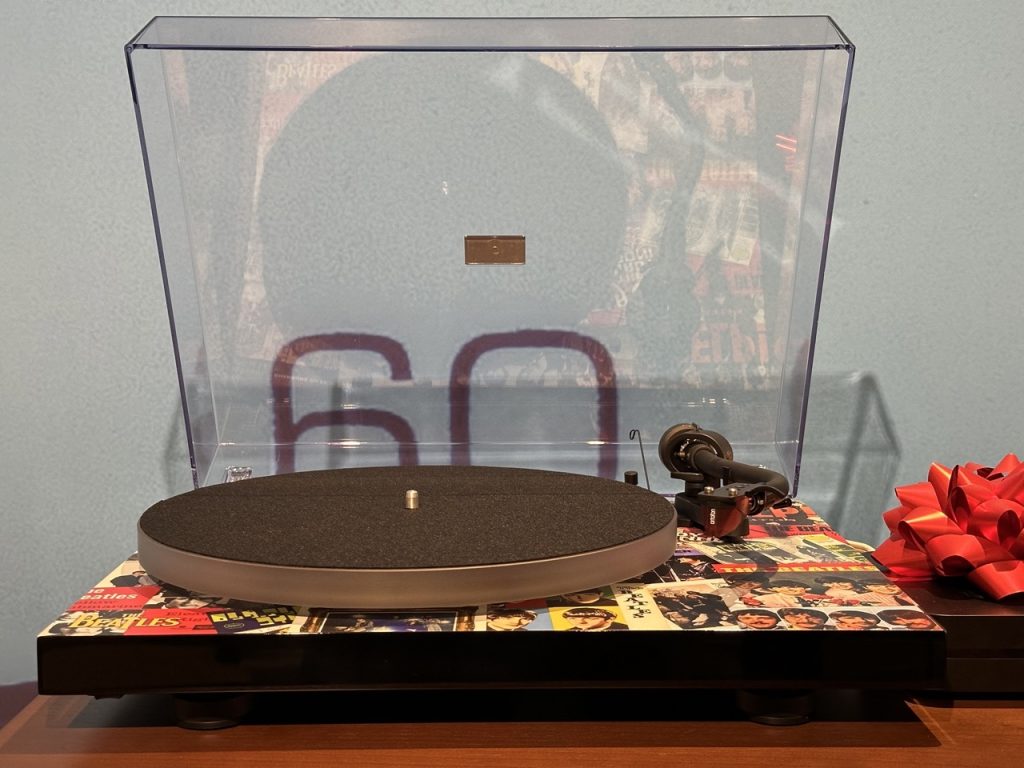
- The turntable should be placed on the top shelf. This provides room for the dust cover to lift up and easy access to put records on and off the table.
- The next shelf down should be the receiver. This puts it at a higher level so that you can comfortably read the display and access the buttons if you don’t have a remote control.
- On the third shelf down, you can put your CD player or cassette deck for easy access to change CDs or tapes.
- Next, music streaming devices can go on the bottom shelf since they are usually controlled by an app on your phone, tablet, or computer.
For your speakers, the placement can affect the overall performance of the sound you hear.
- Having the proper spacing between the cabinet and other obstacles impacts how you hear the sound.
- For instance, the closer to a corner that you place your speakers, the more “boomy” the sound will become due to reflections off of the sidewall.
- It’s best to have your speakers at least 1 foot or 30 cm away from the wall.
- The distance between the speakers plays an important part in the overall stereo imaging.
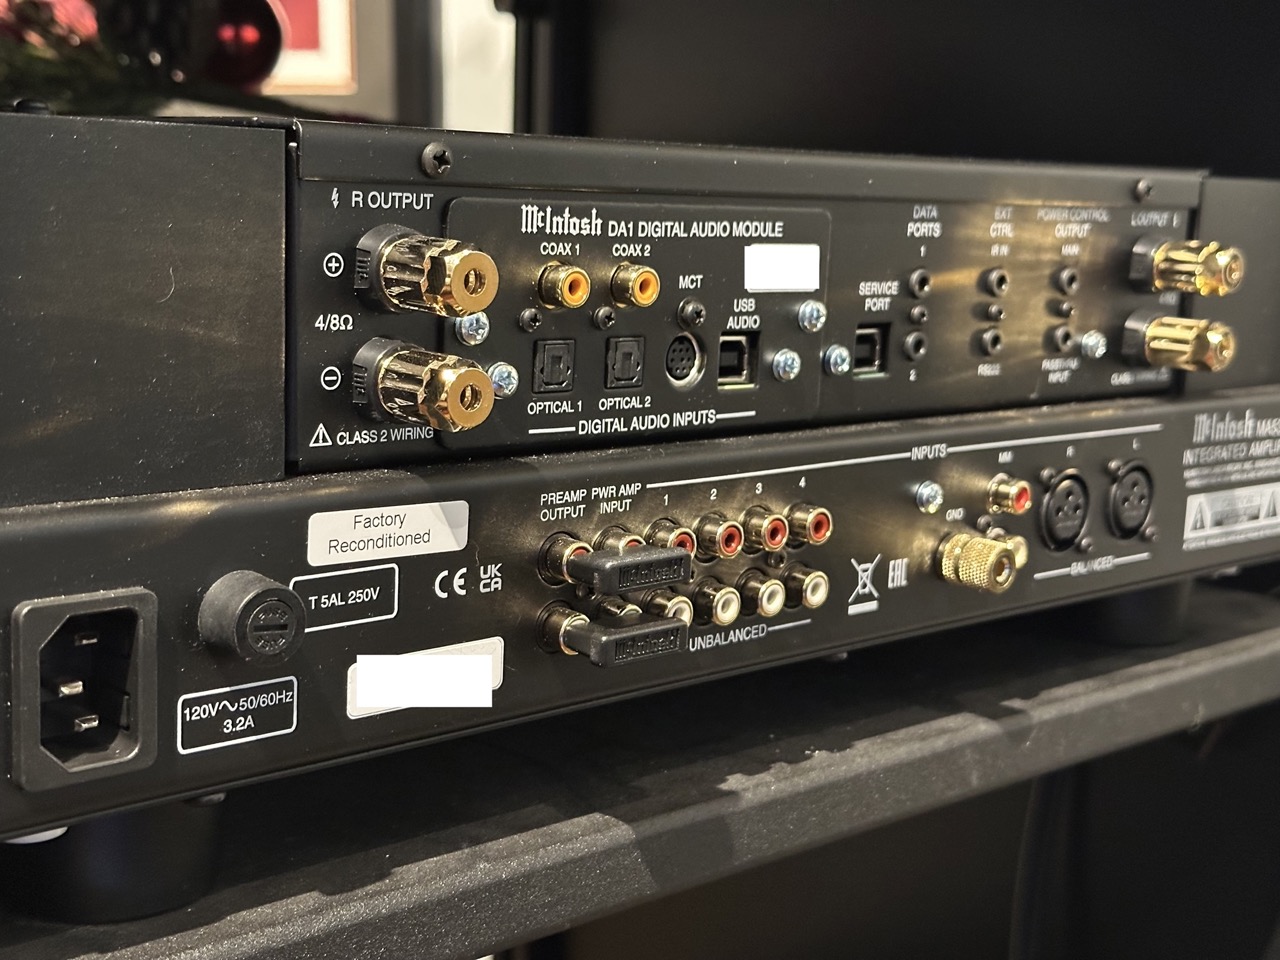
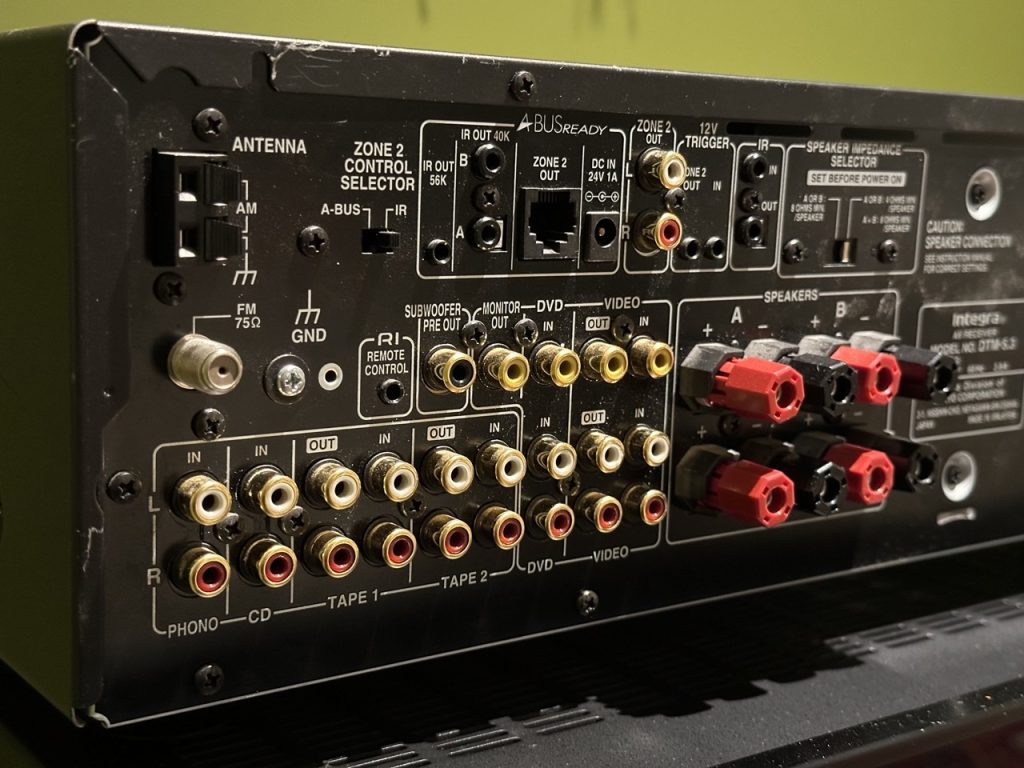
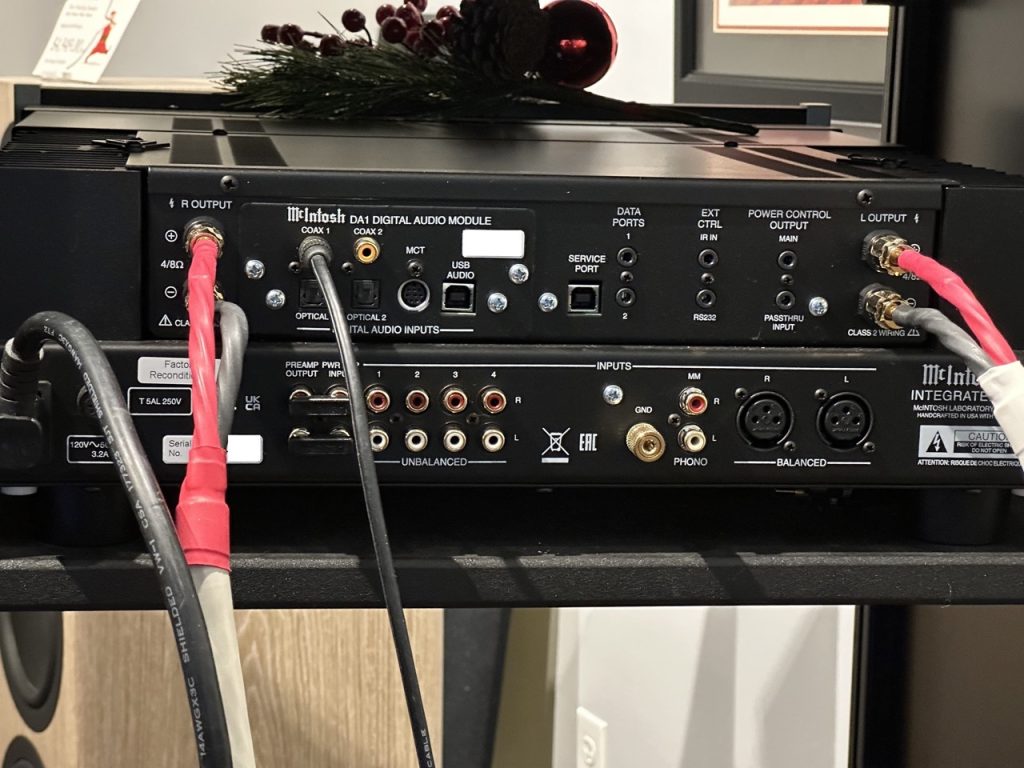
Here’s a rear view of the stereo receiver. This shows the connections that are available, such as the inputs for music and the speaker outputs.
3. Connect the sources to the receiver.
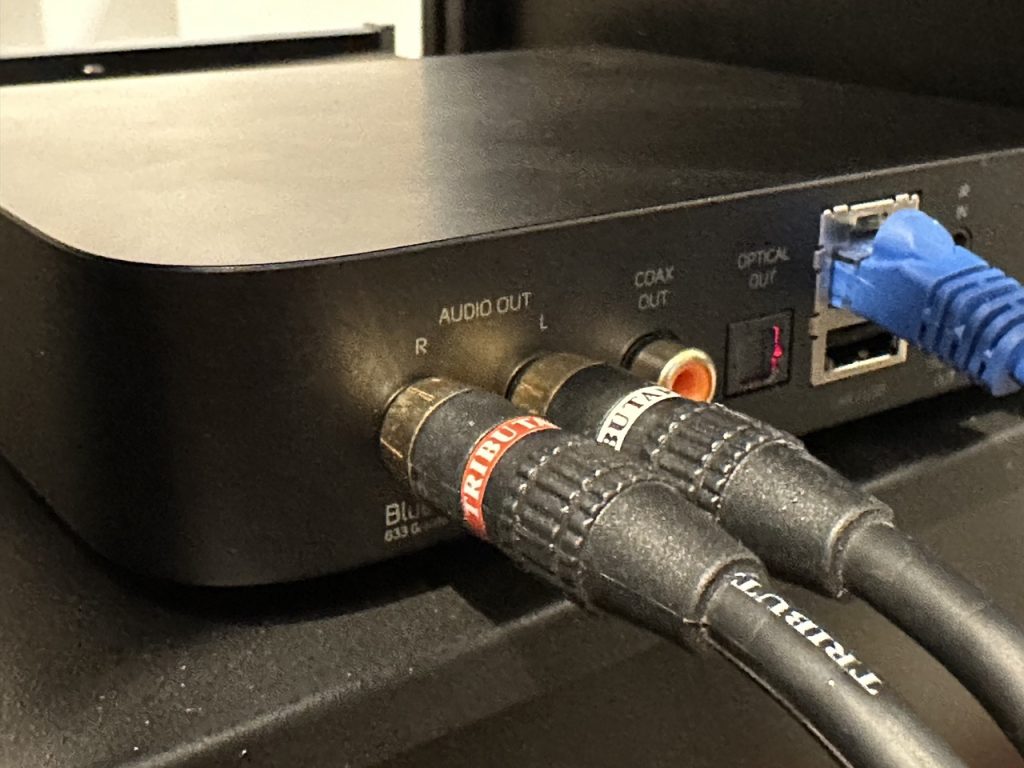
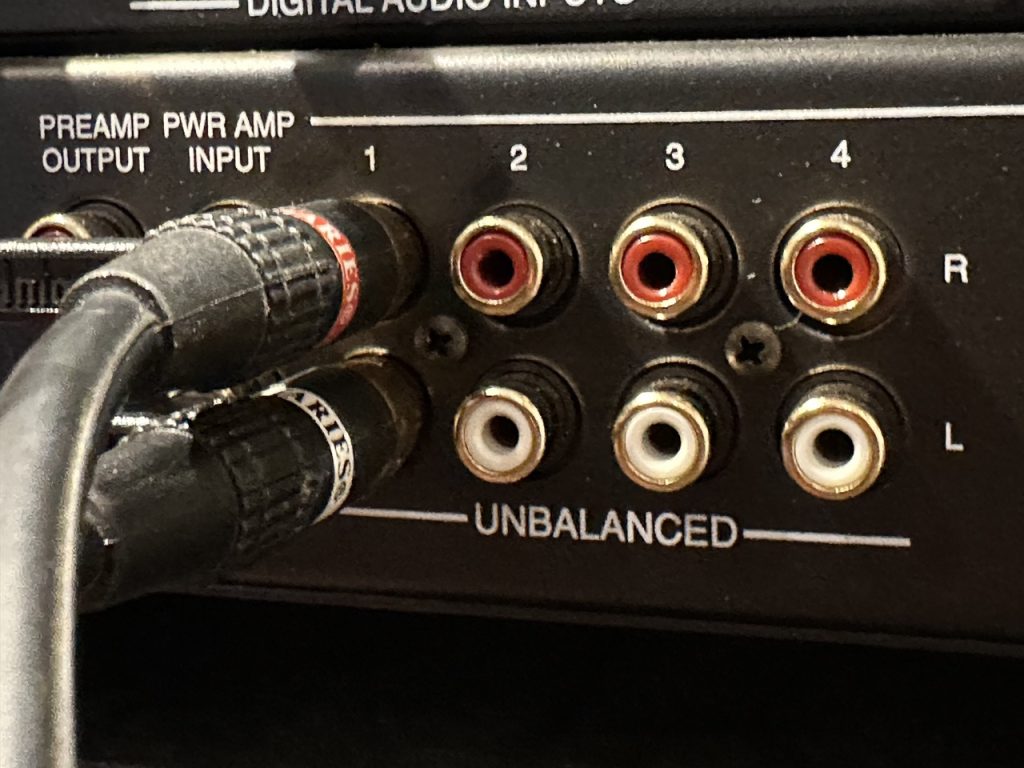
Most sources of music will have a right and left audio output jack on the back. These are usually red (for the right channel) and white (for the left channel) and labeled “output” on the back of the device.
To connect the music source to the receiver, you need to use a cable. If you’re using an analog cable, the red ends will plug into the red holes, and the white ends will plug into the white holes.
Most receivers label the inputs by the type of source. For instance, there will be a “CD” input for your CD player.
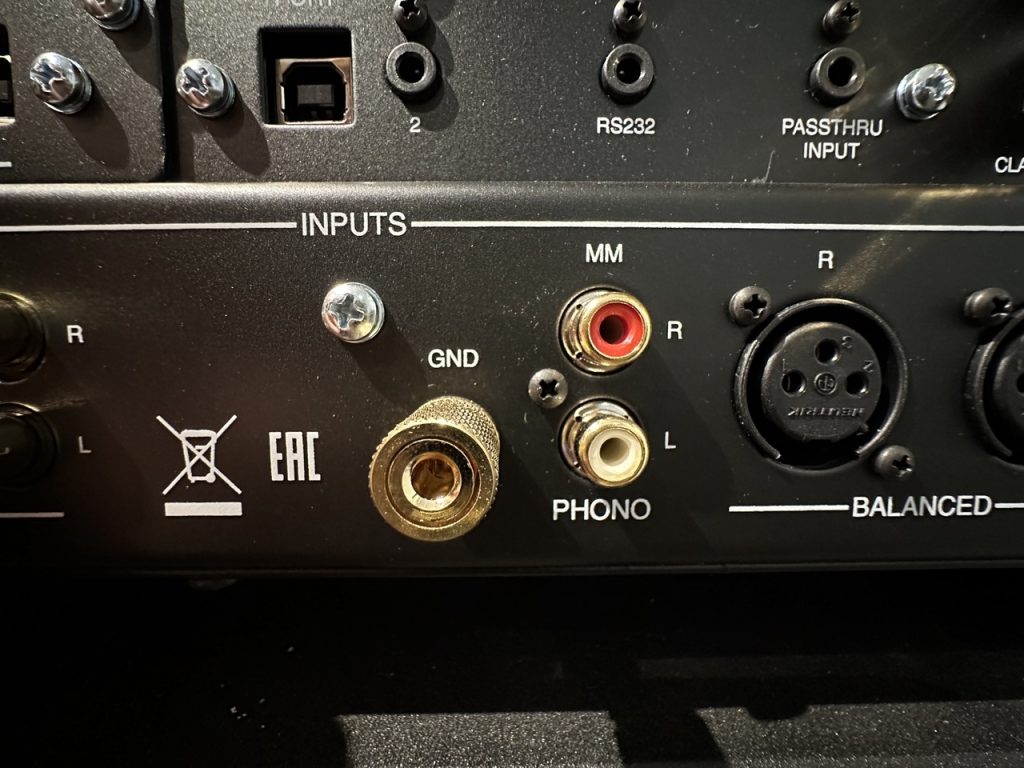
If you’re connecting a turntable, it MUST be connected to the input marked “turntable” or “phono” (short for phonograph). The reason turntables need to be connected to this specific input is because the signal level from the turntable is different from the other sources.
Other sources such as cassette decks, streamers, computers, etc. can plug into any input marked “aux/auxillary”, “tape”, “DVD”, “in/input”, etc.
Plug in the audio cable into the network streamer’s analog audio output (top picture) and then plug the other end into the stereo receiver’s analog audio input (bottom picture).
4. Run your speaker wire from the receiver to your speakers.
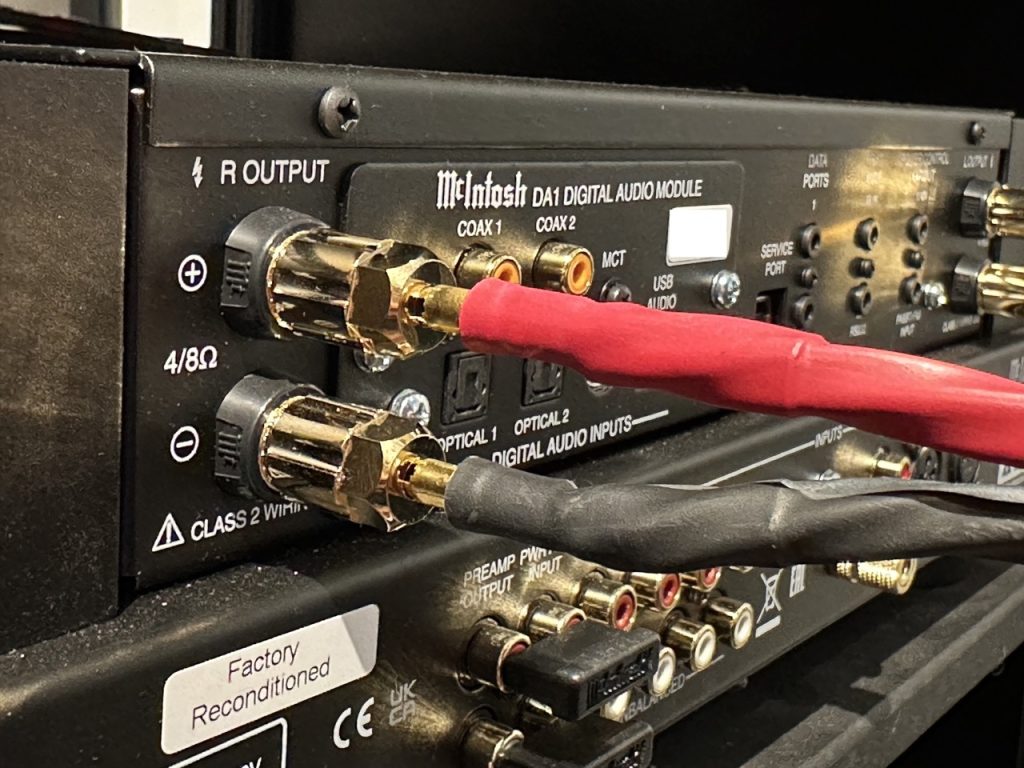
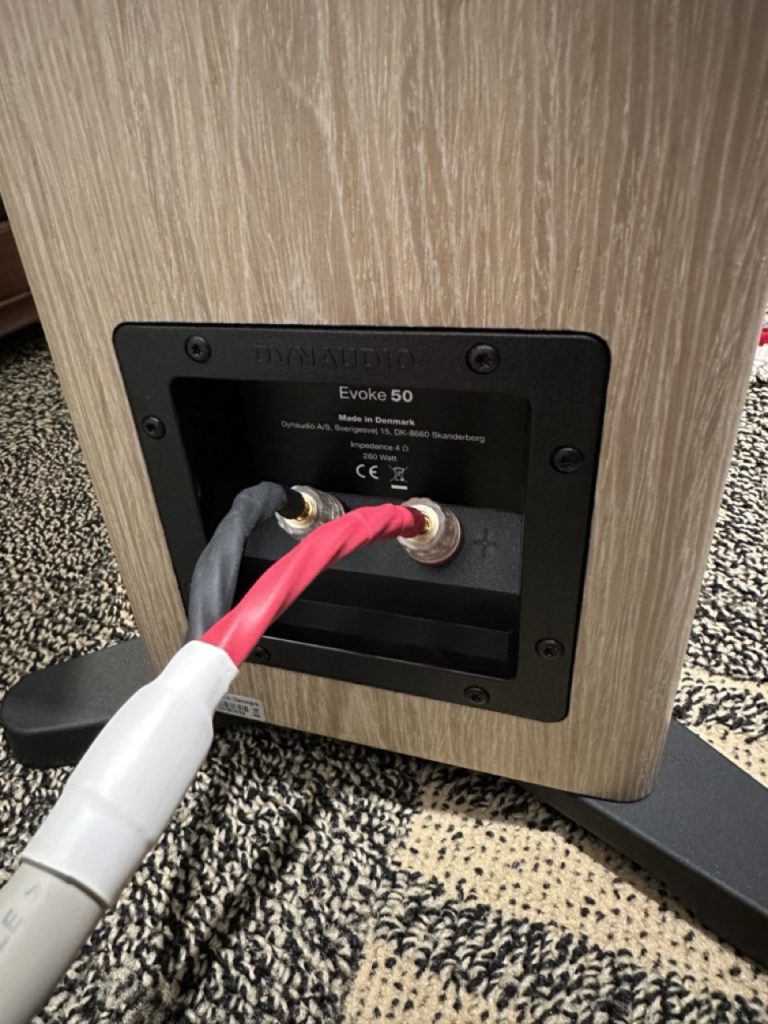
On the back of the speakers, look for the speaker terminals (typically red and black in color) – this is where you connect the speaker wire.
Some receivers or speakers may have clips that you push down to connect the wire to. More commonly would be a connection called a 5-way binding post which enables you to connect wires in several different ways. To connect to this, you unscrew the cap, place the speaker wire inside the hole, and screw the cap to tighten it back down again.

Make sure no strands of wire touch each other from the red (positive) and black (negative) terminals. This could cause your system to short circuit.
Use the proper length cables and wires so that they are not stretched too tightly to allow you to move your equipment.
Connect the speaker wires from the terminals on the receiver (top picture) to the inputs on the back of the speakers (bottom picture).
Here’s a rear view shot of your receiver with all the connections you’ve made. Here, your network stream is connected on the left side, while your speakers are connected to the terminals on the left and right side.
5. It is now safe to plug your stereo system into the electric outlet.
Make sure the volume is turned all the way down to zero when powering up your system to protect the speakers from damage. Start playing music from your CD player or turntable and turn the volume up slowly to the appropriate level.
At this point, you should have everything connected and ready to go.
I hope this has been educational and has helped you get your stereo system set up and running. If you have any questions about setting up a stereo or want a more in-depth explanation of anything in this article, please comment below.